Things have changed a little bit, in MacOS Sonoma. Adding printers to your dock requires a few more steps and locating the correct option.
Adding the printer to the dock is now handled, by the Print Center and is super easy to add from there. Follow the simple steps below and add the printer to your dock, yourself!
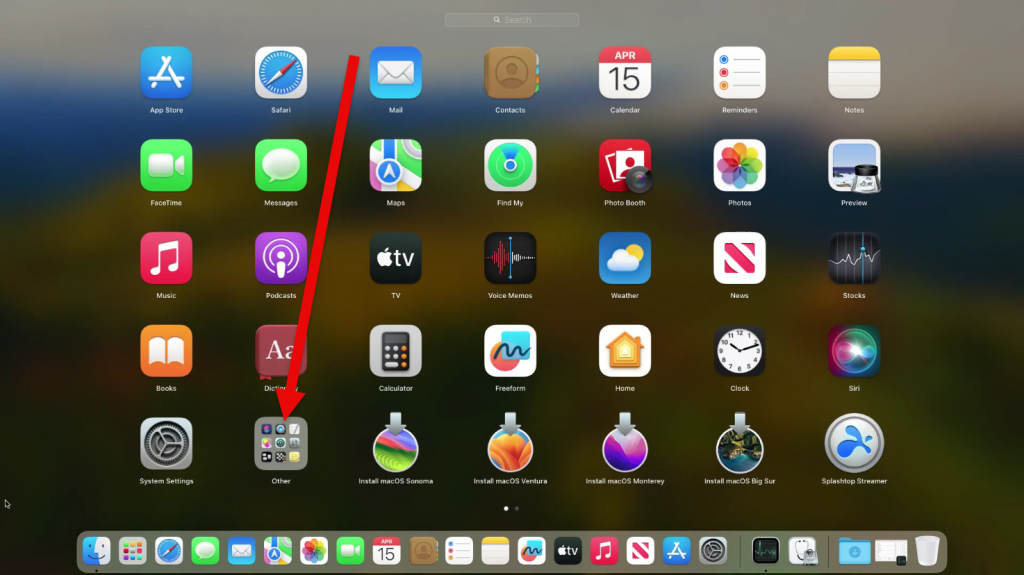
- Locate the Launch Pad on your dock.

2. In the Launch Pad, locate the Other Group and click on it to expand.
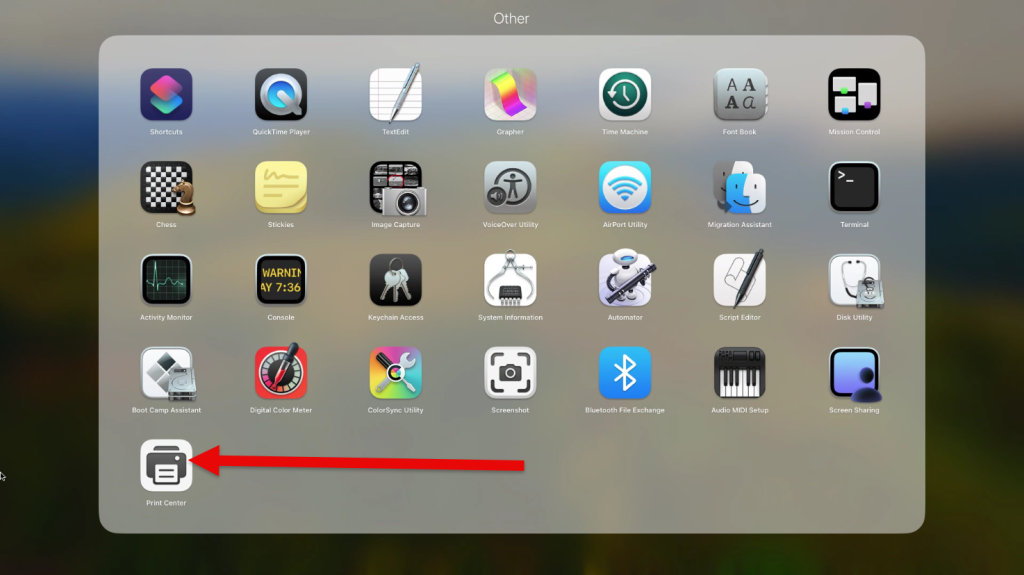
3. Locate the Print Center icon and click on that, to launch the print center.
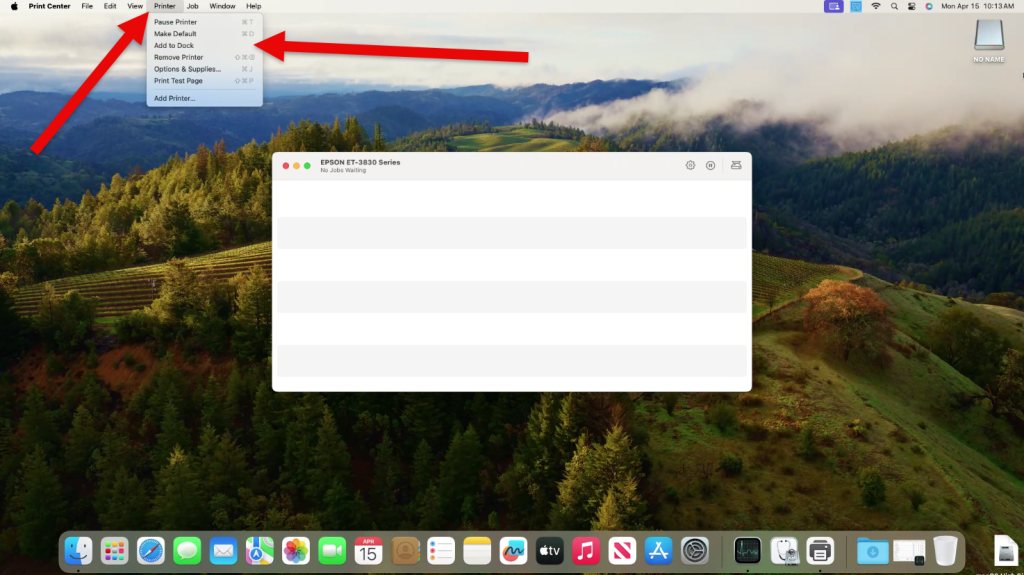
4. Once you click on print center, you will be greeted with the window in the screenshot below.
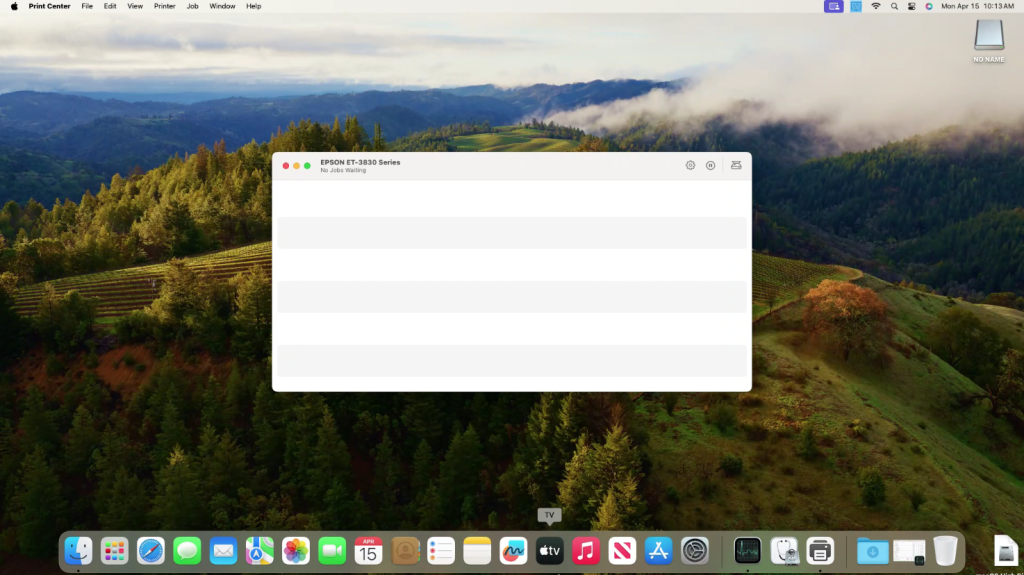
5. At the top of the screen, locate “Printer” and select “Add to Dock“
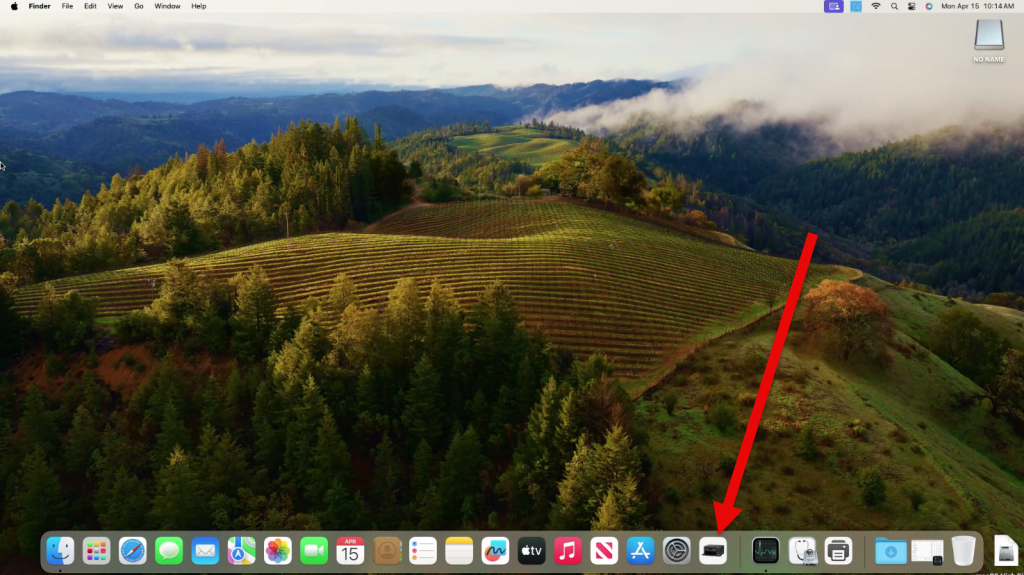
6. When you are done, add it to the dock. It should appear in the dock below.
Congratulations! You have now completed adding your printer, to your MacOS dock.
Related Reading
- How to remove those relentless Google Chrome and/or Microsoft Edge notifications for GOOD! – related guidance from The IT Guys archive
- How to reinstall Windows 11 Phone Link – related guidance from The IT Guys archive
- How to add the newer “End Task” option to your Windows 11 Taskbar – related guidance from The IT Guys archive
FAQ
Should I do this on a work Mac?
Check business requirements first. Managed Macs, shared devices, and Macs used for payment, accounting, or production work may need a backup and a maintenance window.
What should I check before changing macOS settings?
Confirm you have a current backup, administrator access, app compatibility, and any needed passwords or recovery keys.
When is it worth getting help?
If the Mac stores business data, has account or permission issues, or the change affects backups, security, or customer work, it is safer to get help first.